A kitchen is a hub of culinary creativity, and the appliances within it are the tools that bring your gastronomic visions to life. When it comes to installing a Whirlpool stove, a vital component of this setup is the power cord installation. This seemingly straightforward task holds significance for the safe and efficient operation of your stove. Let’s explore the process of Whirlpool stove power cord installation and the importance of ensuring it’s done correctly.
Understanding the Power Cord:
The power cord is the link between your Whirlpool stove and the electrical outlet. It carries the necessary electricity to power the stove’s various components, such as the heating elements, controls, and display features. While it might seem like a simple connection, the power cord’s proper installation is essential to prevent electrical hazards and ensure the stove’s performance.
Safety First:
Safety is paramount when it comes to appliance installations, and Whirlpool stove power cord installation is no exception. Incorrect installation can lead to electrical shocks, short circuits, or even fires. Professionals emphasize the importance of ensuring that the power cord is properly grounded and connected to the appropriate voltage to prevent any safety risks.
Compatibility Matters:
Whirlpool stoves come with different power requirements based on the model and features. It’s crucial to ensure that the power cord you’re using is compatible with your specific stove model and the electrical outlet in your kitchen. Using the wrong power cord or attempting to modify one can lead to electrical issues and potentially void your warranty.
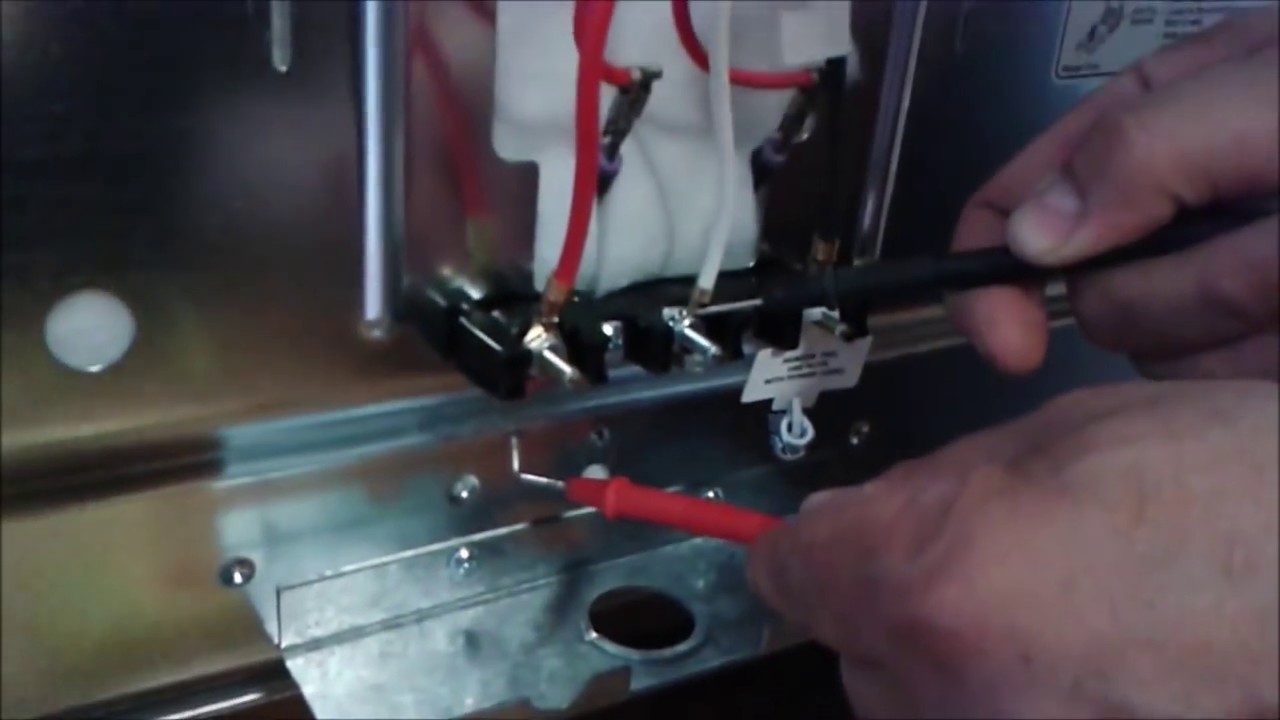
Proper Installation Steps:
-
Preparation: Before beginning, ensure that the stove is unplugged from the electrical outlet and turned off.
-
Check the Cord: Inspect the power cord for any signs of damage, such as fraying or exposed wires. If you notice any issues, replace the cord before proceeding.
-
Check the Outlet: Make sure the electrical outlet is properly grounded and has the correct voltage for your stove.
-
Attach the Cord: Attach the appropriate end of the power cord to the designated terminal on the back of the stove. This terminal is usually labeled.
-
Secure the Connection: Tighten the screw on the terminal to secure the connection. Ensure that the wire is securely attached without any slack.
-
Insulate: If your power cord has multiple wires, ensure that each wire is correctly connected and insulated. Wrap electrical tape around each wire’s connection point to prevent exposure.
-
Final Checks: Double-check all connections, ensuring that there are no loose wires or exposed connections. Once satisfied, carefully move the stove back into position.
When in Doubt, Seek Professional Help:
While power cord installation might seem straightforward, mistakes can have serious consequences. If you’re unsure about any aspect of the installation process, it’s recommended to seek professional assistance. Certified technicians have the experience and expertise to ensure that the power cord is correctly installed, minimizing the risk of electrical hazards.
Final Thoughts:
Whirlpool stove power cord installation is a critical step in setting up your kitchen for success. Ensuring that the power cord is properly installed, compatible with your stove model, and connected to the correct voltage is essential for safety and performance. If you’re uncomfortable with any part of the installation process, don’t hesitate to consult professionals who can guide you through the process or handle the installation for you. Remember, a properly installed power cord contributes to a safe and efficient cooking experience in your kitchen.