In this article, I will explain how to Convert User Mailbox to Shared Mailbox in Office 365 using Office 365 and PowerSell.
Microsoft 365 is a cloud-based platform that offers many advanced features which allow them to enhance teamwork, and collaboration, innovation among each other. Shared Mailbox is one of them which is specifically for users working in teams. Unlike User Mailbox, Shared Mailbox content can be accessible to multiple users without any license and make communication easy.
The advantage of Shared Mailbox is that you can give multiple users access to it. This is great when users need to leave the organization and others can pick up the work from there.
Why do we Need to Convert User Mailbox to Shared Mailbox in Office 365?
Some of the reasons why we need to migrate the user mailbox to shared mailbox are listed below.
- Sharing Data: When the workload increases, the user can create a Shared Mailbox so that multiple users can access the data. which was done by a single user before.
- Better Time Management: Now since each member has the calendar entries of each other, it becomes easy to schedule meetings and events without wasting time.
- Reduction in response time: Since it’s Shared Mailbox multiple users have access to the Mailbox, and many users are available for the client.
- No license needed: A Shared Mailbox does not require a license which will save license costs and the storage is up to 50GB.
- Support one-to-many messages: one-to-many or many-to-one. Everyone who is engaged in this will receive mail.
- Facilitate team collaboration: Shared Mailbox makes collaboration strong, team member sees the emails and deals with them.
- Track conversation and divide the workload: by sharing the inbox, it will be easy to track because you have everything in one place you can track all the activity and divide the workload according to it.
- Bring transparency: the thing we love most about shared mailboxes is transparency. If you are sharing emails, you’re also making all the information available to anyone on the team with a Shared Mailbox link.
What You Need to Know Before Converting User Mailbox to Shared Mailbox
Before converting User Mailbox to Shared Mailbox there are a few things you need to know:
- Before converting to Shared Mailbox the User Mailbox must have a license then only you can convert it to Shared Mailbox.
- Mailbox size is limited to 50GB.
- No online Archive.
- You cant sign in directly to Shared Mailbox, you need to have a User account for that.
- Any user can delete the mail from Shared Mailbox, there is no way to prevent that.
- Share the mail with not more than 25 people.
- To increase the size up to 100GB, you need to buy the Exchange Online plan to the Shared Mailbox.
Method 1. How to Convert Office 365 User Mailbox to Shared Mailbox by using Office 365.
Step 1. Login to Office 365 Admin Center and go to users -> Active users.
Step 2. Select the user Mailbox you want to convert.
Step 3. At the Mail option, Select convert to Shared Mailbox.

Step 4. Press Convert.

Step 5. When the mailbox is converted PRESS DONE.

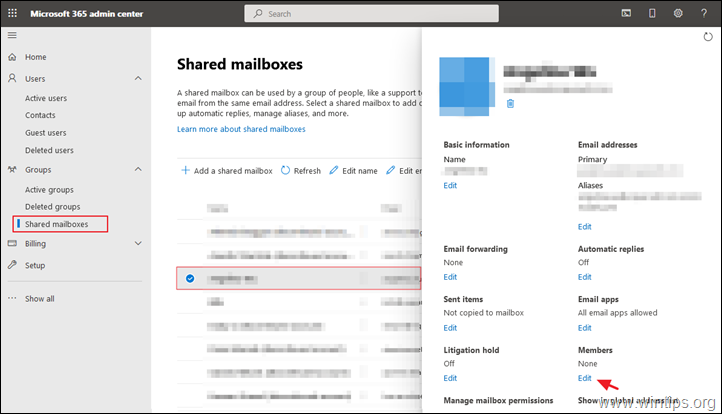
Step 6. Now, from the main page of the Office 365 Admin Center,
Select Groups> Shared mailboxes.

Step 7. Select the new Shared Mailbox, now click Edit under the Members option then add the users that you want to access.
Method 2. How to Convert Office 365 User Mailbox to Shared Mailbox by using PowerShell.
Another way of converting the mailbox is to use PowerShell. Make sure you have installed the Exchange Online Module in PowerShell before you begin.
We are going to use the Set-Mailbox cmdlet to convert the mailbox. You only need to know the mailbox name and email address of the mailbox:

The cmdlet won’t show any output, to verify if the mailbox is successfully converted we can use the PowerShell command.

Method 3. How to Convert Office 365 User Mailbox to Shared Mailbox by Alternative Method
The manual method involves human errors and it is complex and required skills to perform. So to overcome this drawback we have Office 365 to Office 365 Migration Tool.
Step 1. Download and Run the software.

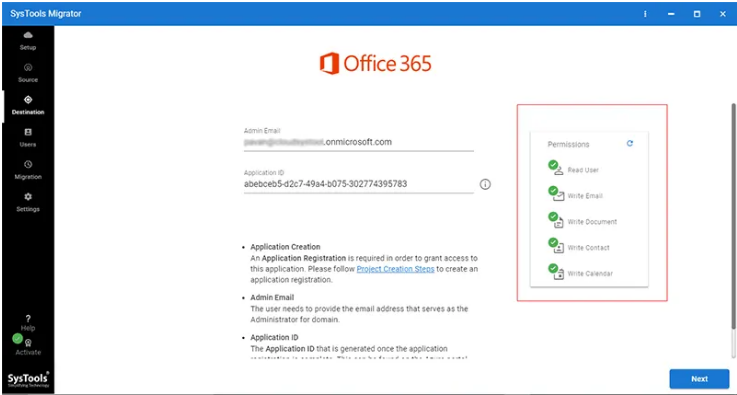
Step 2. Select the source and destination.
Step 3. Select a category, email, documents, task, calendar, and group. Apply Date Filter if required.
Step 4. Now enter admin login credentials (admin email and application id).

Step 5. Let the tool verify the permission.
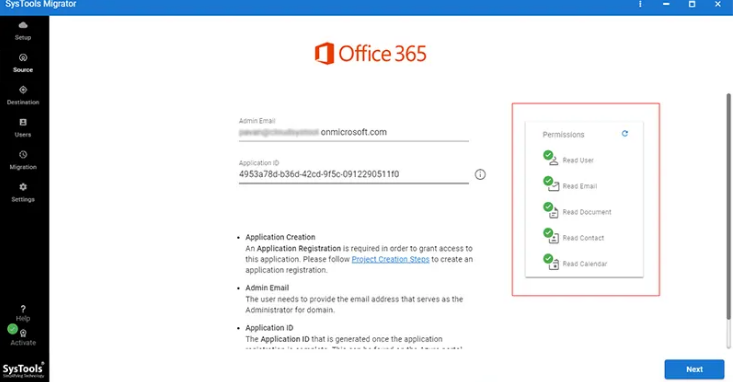
Step 6. Now, permission is valid, click “NEXT”.
Step 7. There are several ways of mapping the users. The three ways are :
- Fetch users
- Import users
- Download Template

Step 8. After mapping, click on validate
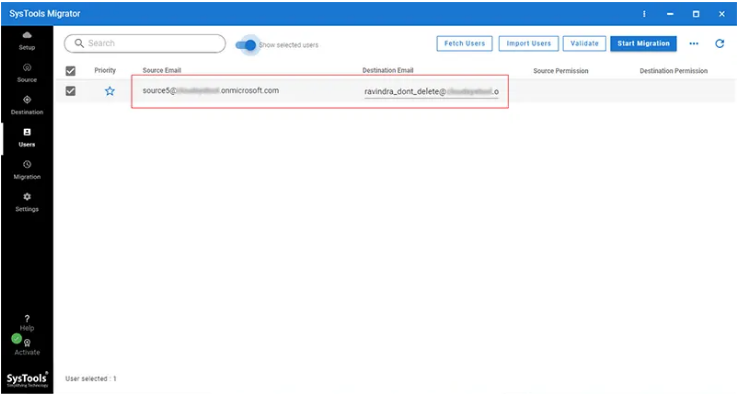
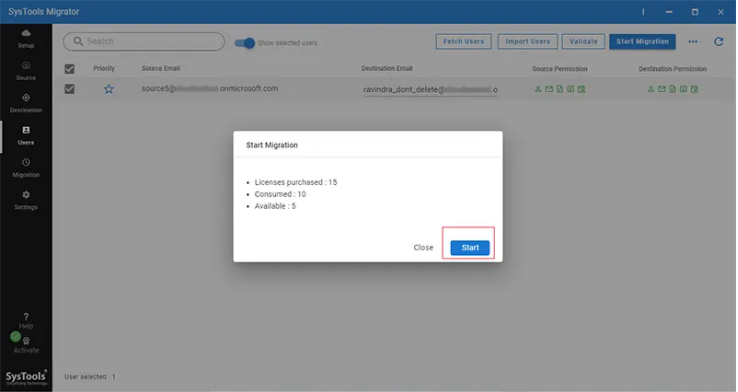
Step 9. After validation, click on start migration to start the process.
Also, read – How to Export Office 365 Mailbox to PST
Conclusion
Microsoft 365 email service support both User Mailbox and Shared Mailbox. We have discussed How to Convert the User Mailbox to Shared Mailbox Office 365 in two manual ways i.e Microsoft 365 and PowerShell. But performing the manual method is not an easy task when it comes to migrating a large amount of data. Yet it can become hassle-free by using the alternate method which provides secure and error-free results.